
Practical field guide
How to measure an antique light fixture
Record the fixture, glass, mounting hardware, and room as separate sets of numbers. Historic makers did not use one universal “size”: their catalogs distinguish spread, length, depth, diameter, extension, and fitter size. Matching like with like produces better identification evidence than a single width or drop.
Photograph first, then sketch
Photograph the fixture in place before moving glass or loosening hardware. Add straight-on views of the canopy or backplate, every different arm, each shade holder, the sockets, and any maker's mark or stamped number.
Draw a front and side view and label where each measurement starts and stops. “14 inches from the ceiling face to the lowest finial” is useful; “14 inches” alone is ambiguous.
The fixture body
Record each direction
- Overall width
- Measure the widest span across arms, frame, or glass. Record a body or pan diameter separately.
- Vertical length
- Measure ceiling face to lowest point, then record chain, stem, body, shade, and finial separately.
- Wall projection
- Measure perpendicular from the wall face to the farthest point. Catalogs may call this extension or depth.
- Repeated parts
- Record arm count, holder spacing, and whether every arm, socket, and shade is actually identical.
The 1926 Frankelite plate and 1930 Champion plate label comparable profiles differently. Use the catalog image to establish the direction of each printed measurement.
Measure glass and fitter separately
Record the shade's greatest width and height, then the narrow neck or edge that enters the holder. On the holder, record the inside opening and the number and position of retaining screws, clips, or fingers. Photograph the shade both seated and removed.
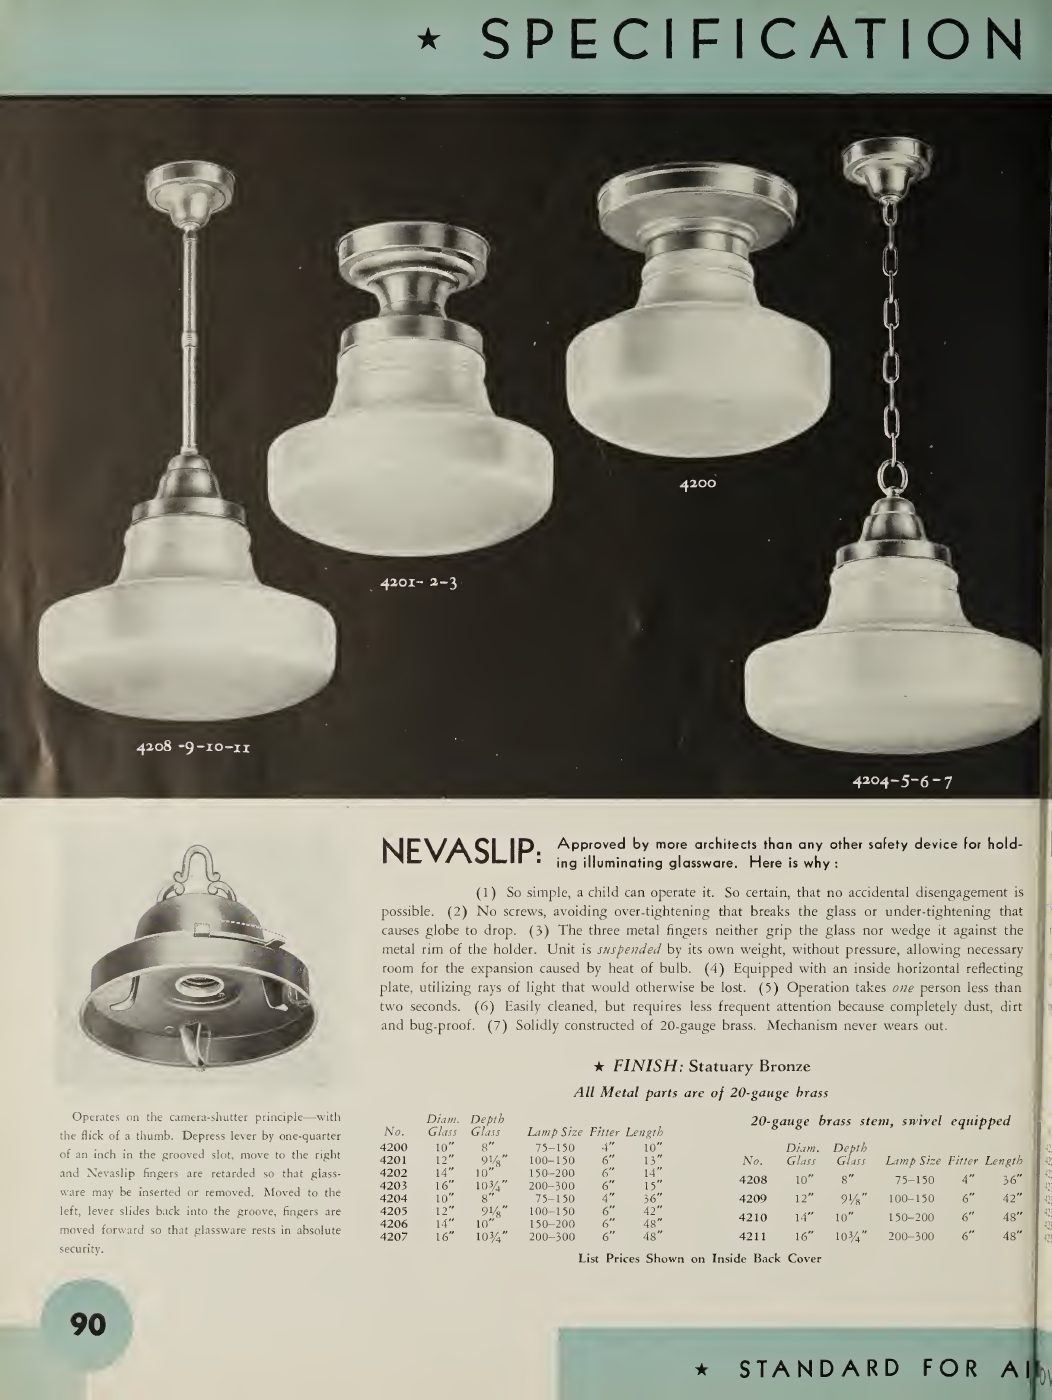
Scan page 94 of the 1934 Lightolier style book lists glass diameter and depth separately from fitter size and total length. It also describes a three-finger Nevaslip holder, showing why the retaining method belongs in the record.
The shade-fitter field guide shows exactly which edge to measure, how to test a holder without forcing the glass, and how historic four- and six-inch examples relate to current replacement shades.
Record the mount and room
For a ceiling fixture, record canopy diameter and depth, visible mounting-hole spacing, and ceiling-to-lowest-point length. For a sconce, record backplate height and width, mounting-hole spacing, and projection. Note whether shades were installed.
Keep ceiling height and nearby clearances separate from the fixture dimensions. They determine whether a fixture fits a location; they do not establish its age.
Leave installed wiring alone
Do not loosen a fixture for one more number
If a measurement requires exposing wiring, opening a ceiling connection, or supporting a heavy fixture, leave it for an appropriately qualified professional. An identification can begin with incomplete measurements and clear photographs.
Dated examples
How three makers labeled dimensions
These plates are primary evidence, not universal definitions. Read each printed number with its fixture drawing, then describe your measurement just as explicitly.
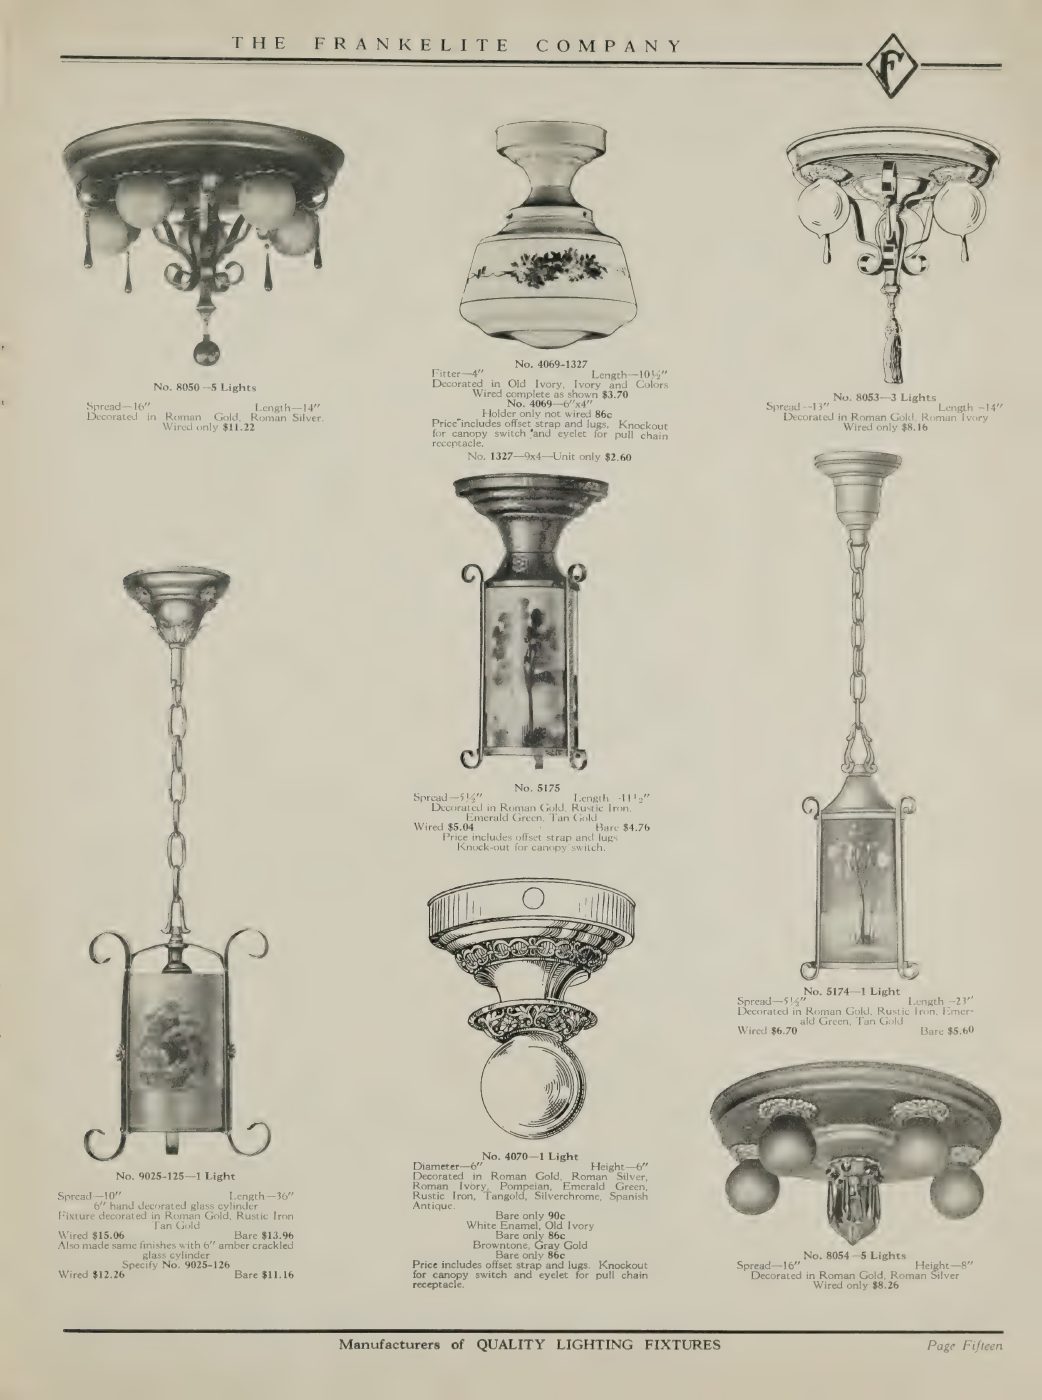
Frankelite, 1926
Spread, length, height, and fitter
One plate uses spread and length for multi-light fixtures, diameter and height for a compact one-light fixture, and a separate fitter dimension for glass.
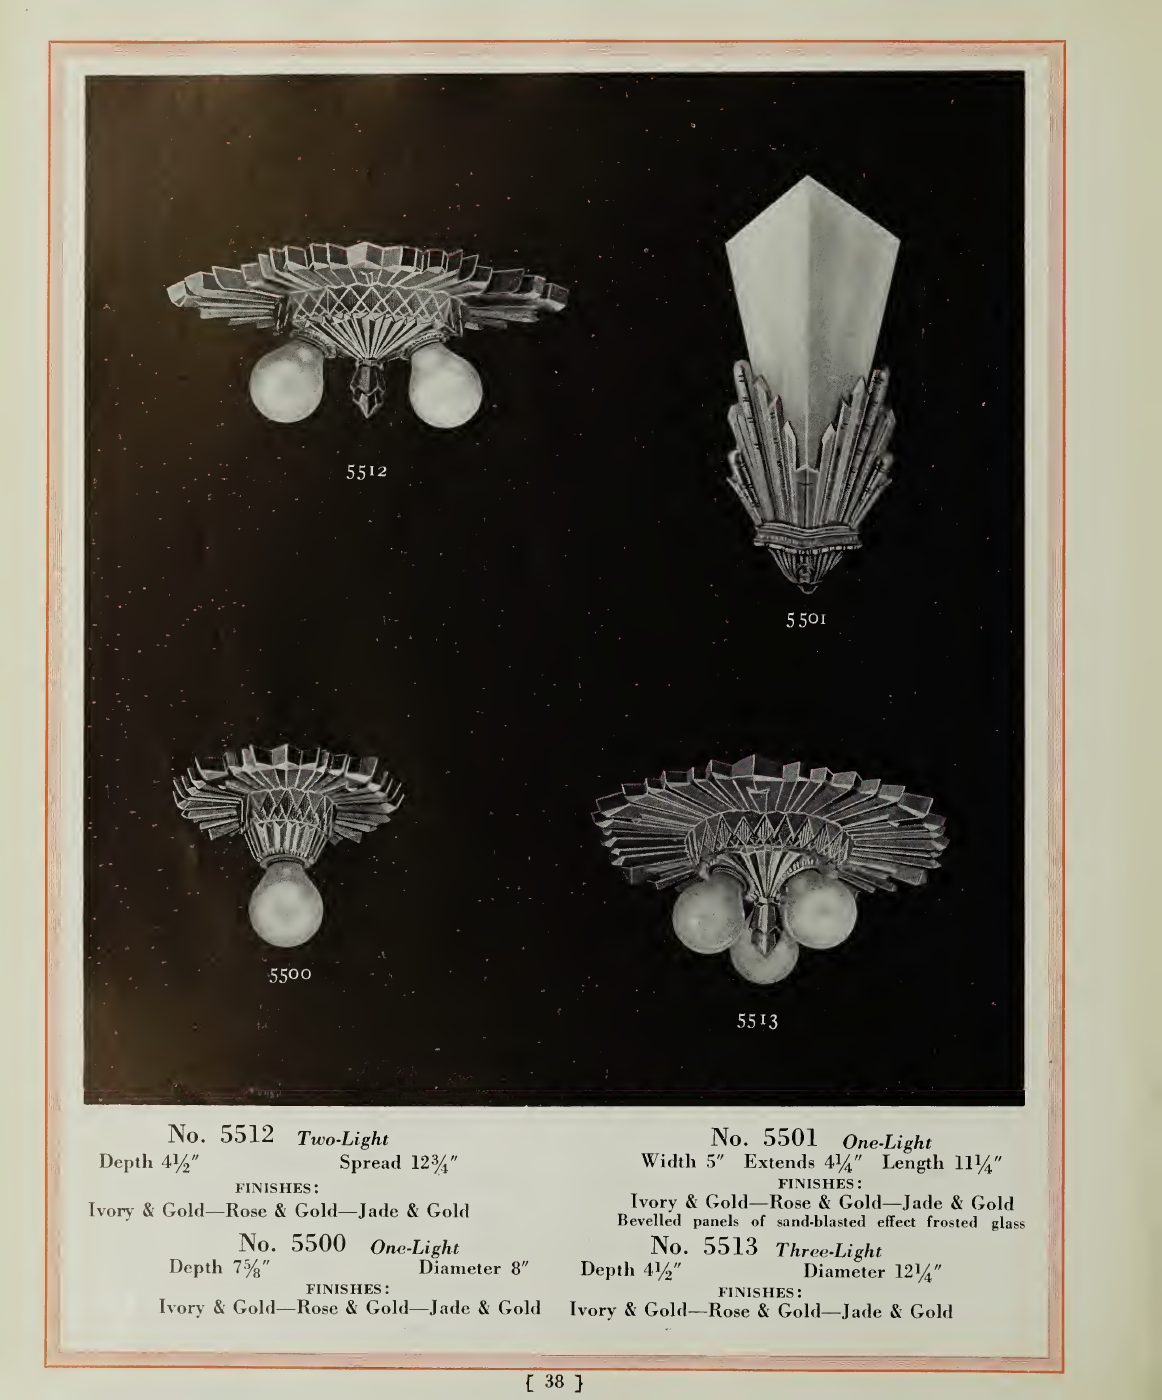
Champion, 1930
Depth, spread, width, and extension
Champion describes ceiling models by depth plus spread or diameter, but gives its wall light a width, extension, and length.
Lightolier, 1934
Glass size is not fitter size
The table separates glass diameter, glass depth, lamp size, fitter, and total length. A 12-inch shade appears with either a 4-inch or a 6-inch fitter.
Research sources
- Frankelite, 1926, scan page 17—fixture and fitter dimensions.
- Champion, 1930, scan page 40—ceiling and wall-fixture dimensions.
- Lightolier, 1934, scan page 94—glass, fitter, length, and holder details.
- Library of Congress trade-catalog guide—institutional directory of digitized collections.
Use the numbers
Compare carefully, then ask for help
The historic catalog field guide explains how to test measurements alongside model numbers and construction. Send unresolved examples through the human-reviewed identification request.